![]()
Here's a little story about how our Mouse & Cheese range came about!
It's from an interview originally published on the Made in Britain shop blog in 2013!
-------------
Product Story - Mouse & Cheese Necklace

Firstly can you introduce us to your work space, what are you surrounded by when you start a project?
Our work space is full of stuff! We're both hoarders (eg. Ruth has an extensive collection of 80's drinks cans
and Brendan has the Now albums nos. 1-16 on vinyl) - so there's not a lot of wall or floor space that is blank.
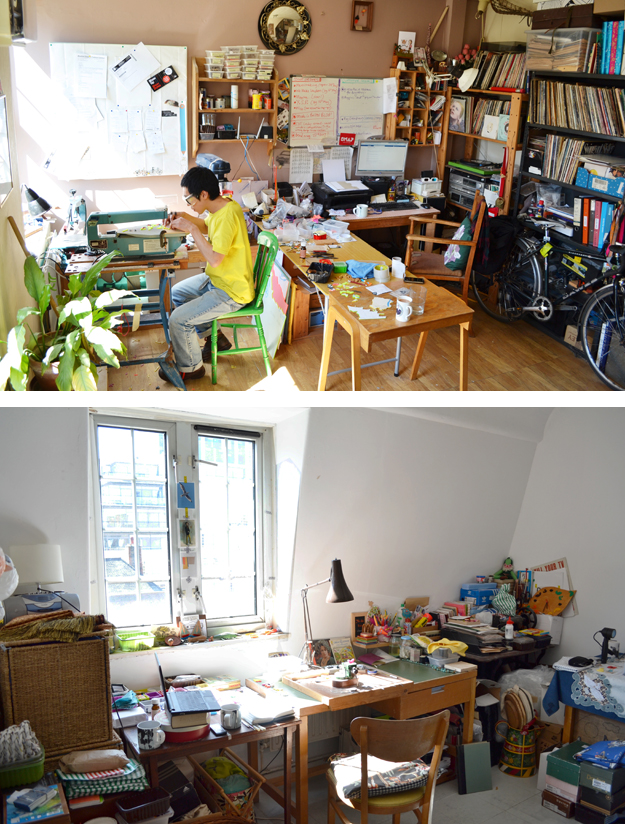
It can also get a bit tricky working on new designs because Brendan loves being messy
and unorganised! There never seems to be a clear surface available or any sketchbooks to hand
so initial sketches are usually made on the back of envelopes retrieved from the recycling bin!
Not all projects are conceived in the work space though - Ruth quite often spends
quiet time on the market stall scribbling new ideas and Brendan has plenty of time to think when
he's on his early morning run around the city.
So, do you remember where and how the idea came about?
We had realised that our 'Rocket & Flame' necklace and our 'Teapot & Cup' brooch were popular - so we were trying to
brainstorm ideas for something similar - that had two elements. 'Cheese & Onion' and other crisp flavours came up in the
conversation - but who would want to wear an onion we thought!? On the other hand, who wouldn't want to wear a piece of cheese
So.....starting with the Cheese - we ended up pairing it with a Mouse - naturally!

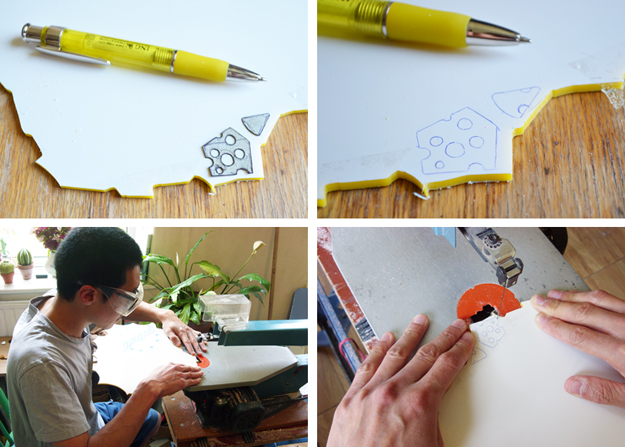
Can you give a brief description of how you started the project? What was the first thing you did to get the project in motion?
We started sketching pieces of cheese and little mice. We also really love mixing other materials with acrylic - and had been playing
around with bits of silver - so decided that the mouse should be made from silver. It's now made from aluminium so it keeps its
shine for longer - and it also makes it more affordable.
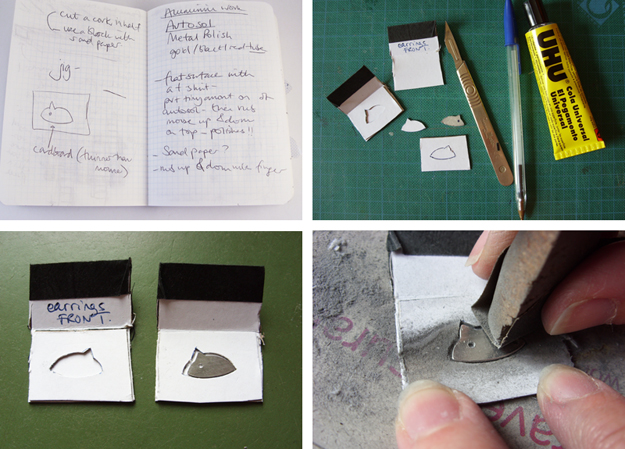
What are the essential tools for this project?
The tools needed to make the cheese are the same as for all the other acrylic designs we do.
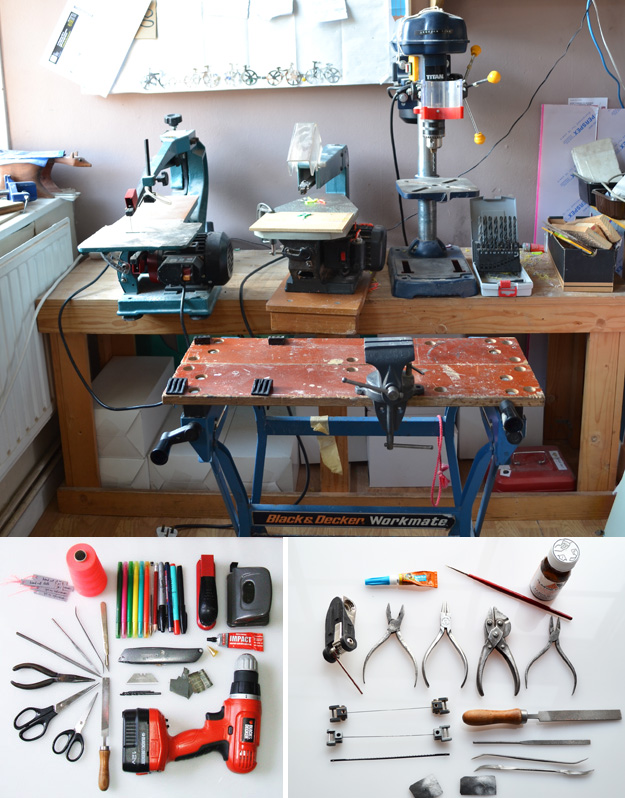
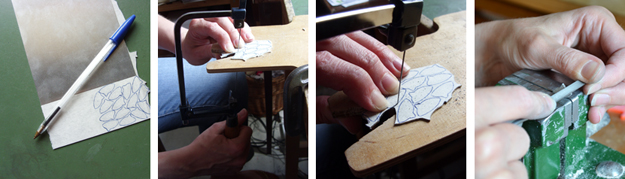
Once we've drawn out the shapes on a sheet of acrylic, Brendan uses our mechanical fretsaw to cut it out.
Next we use our needle files to file the edges, a Stanley blade to scrape the edges smooth and then wet and dry paper (used dry)
to give it a final buff. Then the pillar drill to drill all the cheese holes and a scalpel blade to take off any burrs on the drilled holes.
Then pliers, chain and jump rings to piece it all together.
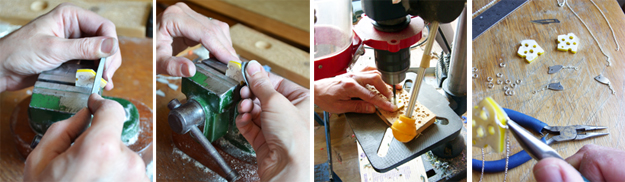
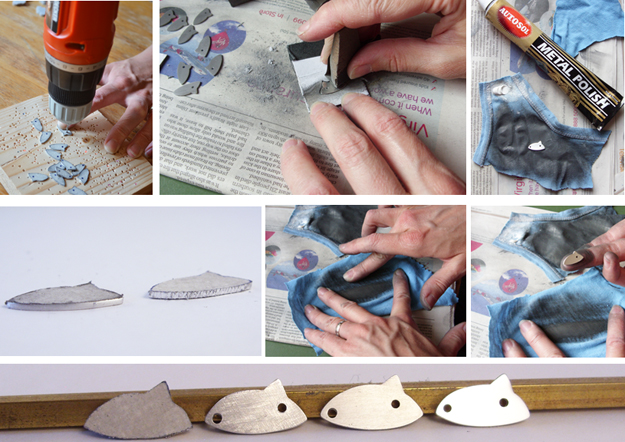
For the mouse, Ruth uses a hand saw to cut each one out of a sheet of aluminium. A hand drill is used for the eye hole and the hole
for the little chain tail to be attached. Then she uses needle files and wet and dry paper (used dry) to smooth the edges. More wet
and dry paper and a cork block is used to buff the flat surface. And then Autosol metal polish and an old t-shirt is used for the final buff!
Can you take us through the stages of development from start to finish?
It's always fun having a new design - and the more we make something, the more it develops. The position of the holes and the shape of the
mouse have changed over time. Initially the cheese had a line scratched into it to try and make it seem more 3D - but customer feedback
meant that we ended up getting rid of the line all together!
Within the whole process of the project what stages did you look forward too?
The aluminium work was fun, it was something new to us and when we managed to get it to work, it was very exciting!
Oh, and of course, tea breaks are an essential part of any project - and the most enjoyable!
Were there any stages you found particularly challenging?
Actually the aluminium work was also the most challenging. We were struggling initially to buff the mice up using Brasso and the hand drill with
a little buffing pad attached - really difficult to hold especially when it got really hot from the friction of buffing! Luckily, Ruth's Dad is a retired CDT teacher,
so on a visit to his house, Ruth got a master class in sanding and buffing metal! Including making a card template to hold the little mouse in place whilst
buffing with wet and dry and just using your finger to rub with Autosol on a t-shirt - It was a revelation and changed her life!
Are there any future plans in the pipeline for new designs? Can you tell us about them?
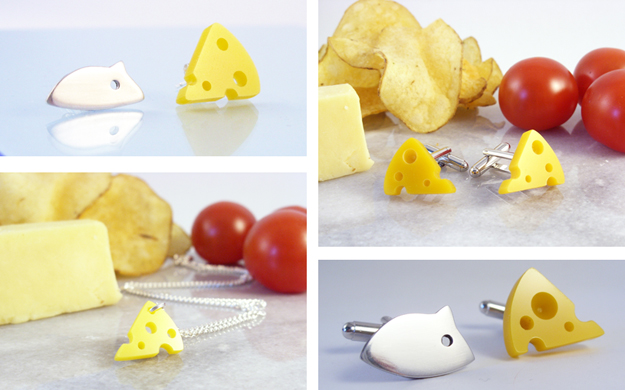
We have already developed the Mouse & Cheese Necklace design to make Mouse & Cheese Earrings and most recently Cheese Cufflinks and
Mouse & Cheese Cufflinks. We've also done a tiny piece of cheese as a necklace and finally made a little piece of Blue Cheese for the
connoisseurs (it's just blue acrylic really)!
Finally, once the project is complete and you have time to yourself what the first thing you do to celebrate?
Probably the first thing we do is post a picture on Facebook! - It's a great way to see what the general reaction is...then we'll pop some on our market stall
and see how the customers react and get some valuable feedback. We can't really celebrate the design until we've actually sold some.....